Die Boss RC-202 Loopstation ist etwas vom Besseren was ich bis jetzt testen konnte. Leider ist sie eher für DJ’s als Gitarristen ausgelegt, heisst man muss vieles von Hand bedienen – was bei einem Gitarristen bekanntlich zu einem Konflikt führt 🙂 Die Möglichkeit Befehle per MIDI zu steuern, legt nahe ein MIDI Footboard zu nutzen. Da ich ein 12-Schalter-Board nirgendwo finden konnte, war klar: selber bauen!
Funktion:
Berichte über selbstgebaute Boards waren im Internet schnell zu finden und wieder mal lag es für mich am Nächsten ein Arduino einzusetzen. Da am Looper nur 5 MIDI Befehle spezifisch gesetzt werden können, habe ich noch zusätzlich den CTL (Standard-Fusskontroller) Anschluss einbezogen . Zusammen – mit den möglichen Standard-MIDI-Befehlen – sind so 12 Funktionen möglich:

Bank / Memory + / – : Wechselt mit dem Standard-MIDI-Befehl „Program Change“ den Speicherplatz. Da der Looper die Speicherplätze in 8 Bänke à 8 Phrase Memories unterteilt, wird mit Bank +/- einfach zum nächsten 8-er Block gewechselt.
Rythmus Tap / On-Off: Die Geschwindigkeit wird „getappt“ und per Standard-MIDI-Befehl (F8 Timing Clock) übertragen. Der 2. Schalter dient zum On-Off schalten des integrierten Drumcomputers über eine der fünf möglichen „Control Change Messages“ .
Track Play-Overdub / Stop / Clear / Undo: Steuert den aktivierten Track über vier der fünf möglichen „Control Change Messages“
Track Change: Wechselt zwischen den zwei verfügbaren Tracks über einer der zwei CTL-Kanäle.
Start-Stop: Startet/ Stoppt den Loop über einer der zwei CTL-Kanäle.
Material:
- Arduino Nano
- PCB Board
- 12 Drucktaster (Nicht Rastend)
- DC Jack (Nutzung der 9V-Effekte-Stromversorgung )
- Stereo Jack 6,3mm (für CTL-Anschluss)
- MIDI 5 Pol. Buchse (für MIDI Steuerung)
- Genügend Kabel
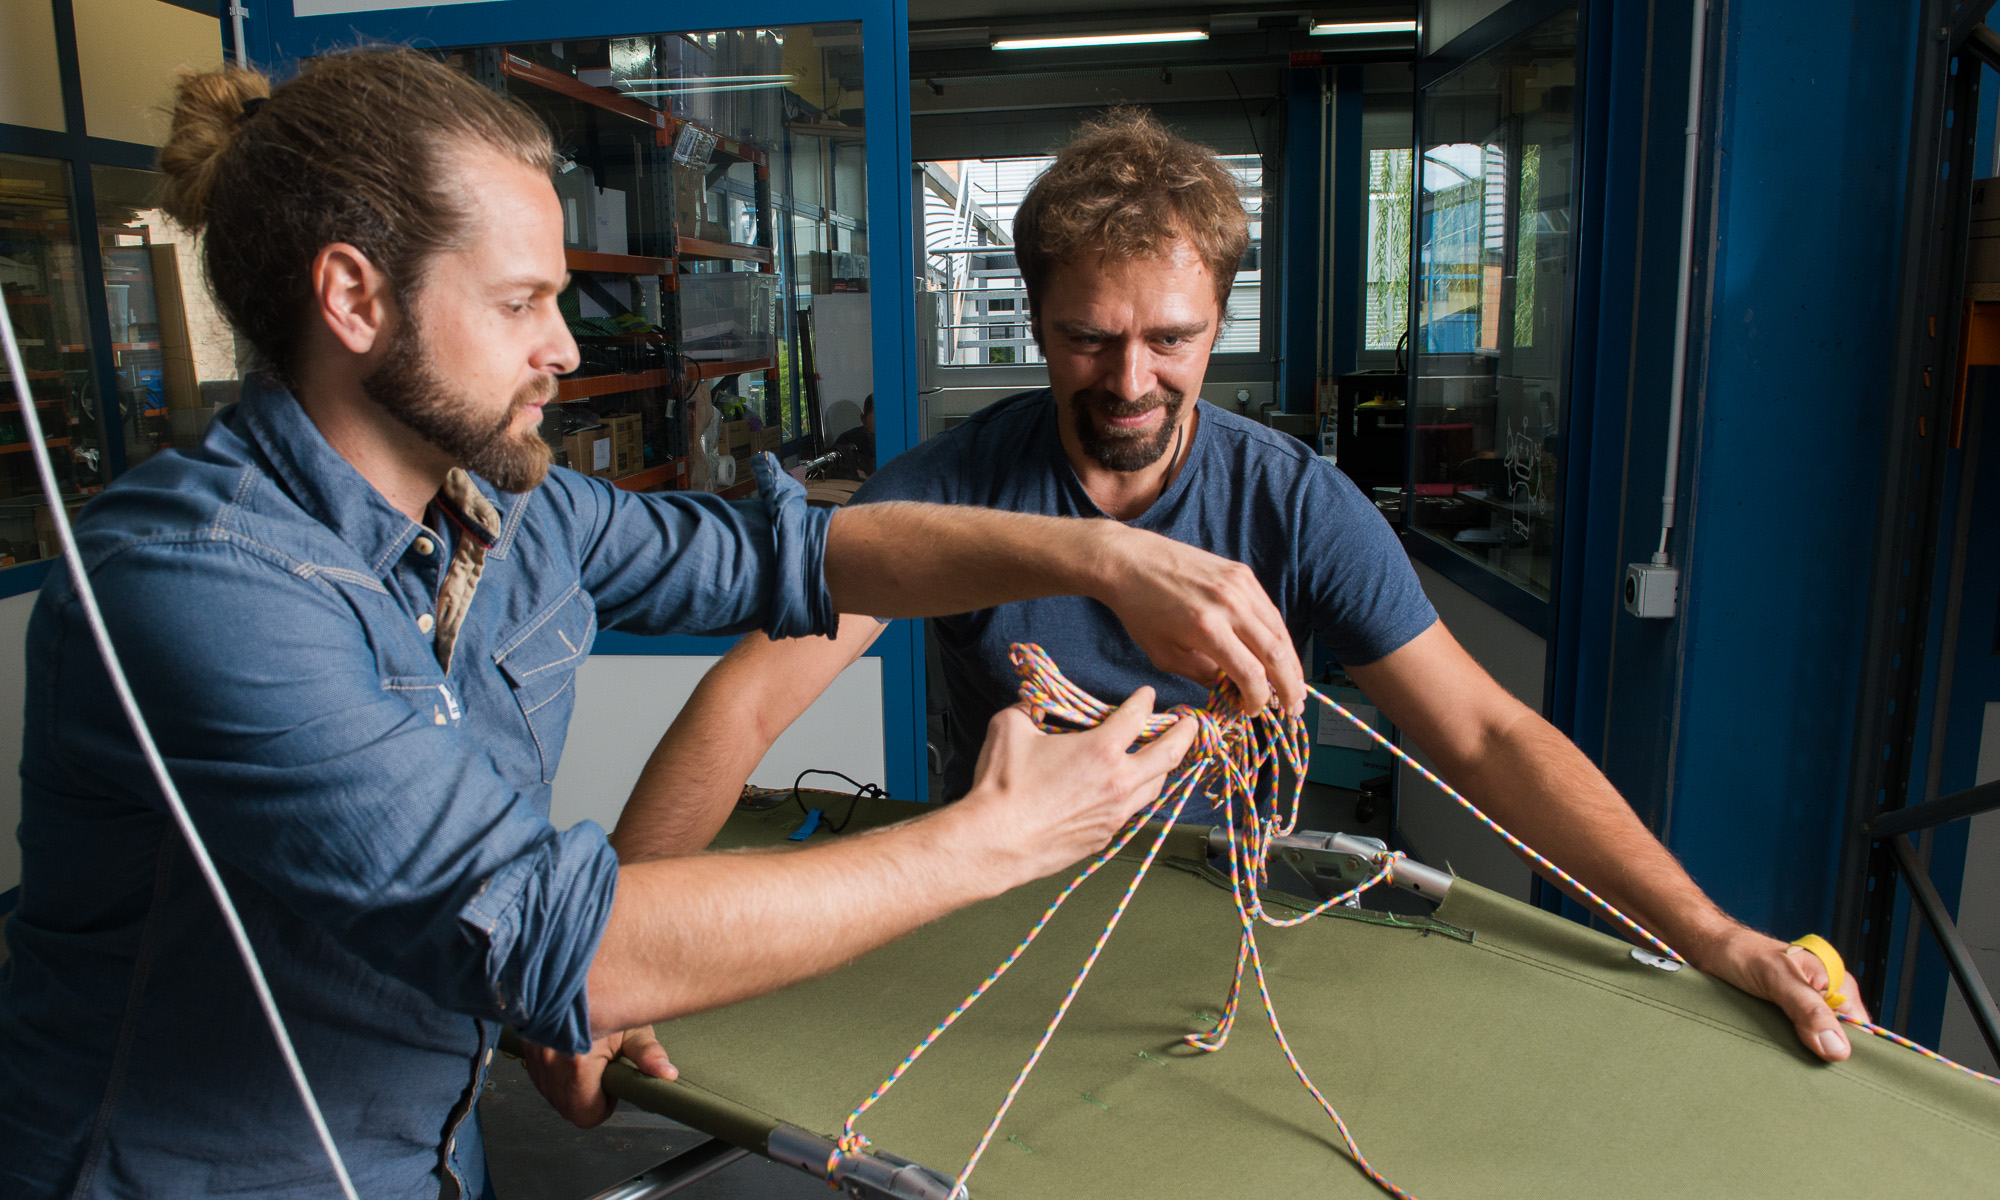
Das Gehäuse habe ich zuerst aus einer alten Transportkiste aus PP gebaut. Schlecht Idee: das Zeugs lässt sich weder vernünftig kleben noch anmalen 🙁

Also zurück zu einem klassischen Holzgehäuse…

Schema:


Programmierung:
„avd_Switch“ ist ein hilfreiche Library um Schalter sauber abzufragen, „MIDI“ liefert (selbstsprechend) die grundlegenden MIDI-Funktionen.
Neben den Standard-MIDI Befehlen (Timing Count, Program Change) werden die Kanäle 80-84 mit einer „Control Change Message“ angesteuert. Was damit dann passiert muss auf dem Looper in den Settings festgelegt werden (Ist im verfügbaren Parameter Guide bestens beschrieben). Die Settings gelten per Bank, d.h. man muss auf allen Banks die Settings einstellen und einen Track speichern damit die Bank-Settings gespeichert werden …
… oder viel komfortabler, die dahinter liegende XML-Konfigdatei editieren. Die ist via USB erreichbar und heisst DATA/BANK.RC0. Unter <ASSIGN[1-8]> werden die gewünschten Werte gemäss Parameter-Guide in <Tgt> eingetragen. Etwas verwirrend ist, dass für Bank 1 die bank id 0, für Bank 2 die bank id 8 , usw. editiert werden muss.
Noch ein Wort zum Rhythmus: Sobald man anfängt zu tappen wird Timing Count abgefeuert (Pro getappter Rhythmus 24 Timing Counts ergibt den Rhythmus in Viertelnoten) Hört man auf tappen werden auch die Timing Counts gestoppt. Das ermöglicht einem danach den Rhythmus wieder am Looper zu verändern (was blockiert ist solange MIDI Messages kommen). Der Rhythmus On/Off funktioniert leider nicht 100%ig. Nach getapptem Rhythmus muss man den Taster 2x drücken um den Drumcomputer zu starten (warum auch immer.. ich habe es bis jetzt nicht rausgefunden).
#include "Arduino.h"
#include <avdweb_Switch.h>
#include <MIDI.h>
#include <midi_Defs.h>

using namespace midi;

//Pins
const byte button1pin = 2;
const byte button2pin = 3;
const byte button3pin = 4;
const byte button4pin = 5;
const byte button5pin = 6;
const byte button6pin = 7;
const byte button7pin = 8;
const byte button8pin = 9;
//const byte button9pin = 10; //direct CTL1
//const byte button10pin = 11; //direct CTL2
const byte button11pin = 12;
const byte button12pin = 13;

/* Footboard Layout
|-Midi-DC-USB-CTL-|
---------------------------------
|| 03 | 02 | 01 | 12 | 11 | 10 ||
|| 04 | 05 | 06 | 07 | 08 | 09 ||
--------------------------------- */

// button to GND, use internal 20K pullup resistor
Switch button1 = Switch(button1pin); //Play Stop Rythm (18)
Switch button2 = Switch(button2pin); //Bank +
Switch button3 = Switch(button3pin); //Bank -
Switch button4 = Switch(button4pin); //Memory Phrase -
Switch button5 = Switch(button5pin); //Memory Phrase +
Switch button6 = Switch(button6pin); //Tab Tempo
Switch button7 = Switch(button7pin); //Play/ Rec (11)
Switch button8 = Switch(button8pin); //Stop (12)
//Switch button9 = Switch(button9pin); //Switch Track (23)
//Switch button10 = Switch(button10pin); //Play Stop All Tracks (16)
Switch button11 = Switch(button11pin); //Undo Redo (14)
Switch button12 = Switch(button12pin); //Clear (13)
//Control Change (must set on each bank)
int control1 = 80; //Control Change Message #80, Play Stop Rythm (18)
int control2 = 81; //Control Change Message #81, Rec/Play target track (11)
int control3 = 82; //Control Change Message #82, Stop target track (12)
int control4 = 83; //Control Change Message #83, Clear target track (13)
int control5 = 84; //Control Change Message #84, Undo/Redo target track (14)
//store actual bank/ prhase
int bankNum = 0;
int phraseNum = 0;
// time helper
int timeAct; //actual time in ms
int timeLast; //time of last loop in ms
int timeTapAct; //actual time tapped in ms
int timeTapLast; //last time tapped in ms
int timeClock=24; //set time clock (timeTap / 24)
int countClock=49; //count the sent midi time clocks
bool rythmOn=false; //status of "play stop rythm"

MIDI_CREATE_DEFAULT_INSTANCE();

void setup()
{
MIDI.begin();
//Serial.begin(9600);
}

void loop()
{

//Send ControlChange 'Play Stop Rythm'
button1.poll();
if(button1.pushed()) {
//Serial.println("1 pushed ") ;
MIDI.sendControlChange(control1,127,1); // Set Control
delay(10);
MIDI.sendControlChange(control1,0,1); // Reset value to prepare for next set
delay(5);
//Save the status (used for time tappinng)
rythmOn=!rythmOn;
}

//Increase Bank. If 8 reached switch over to 1
button2.poll();
if(button2.pushed()) {
//Serial.println("2 pushed ");
if (bankNum == 7) {
bankNum = 0;
}else {
++bankNum;
}
MIDI.sendProgramChange(bankNum*8,1);
//reset phrase number
phraseNum = 0;
}

//Decrease Bank. If 1 reached switch over to 8
button3.poll();
if(button3.pushed()) {
//Serial.println("3 pushed ");
if (bankNum == 0) {
bankNum = 7;
}else {
--bankNum;
}
MIDI.sendProgramChange(bankNum*8,1);
//reset phrase number
phraseNum = 0;
}

//Decrease Phrase Memory. If 1 reached switch over to 8
button4.poll();
if(button4.pushed()) {
//Serial.println("4 pushed ");
if (phraseNum == 0) {
phraseNum = 7;
}else {
--phraseNum;
}
MIDI.sendProgramChange(bankNum*8+phraseNum,1);
}

//Increase Phrase Memory. If 8 reached switch over to 1
button5.poll();
if(button5.pushed()) {
//Serial.println("5 pushed ");
if (phraseNum == 7) {
phraseNum = 0;
}else {
++phraseNum;
}
MIDI.sendProgramChange(bankNum*8+phraseNum,1);
}

//Enable/Disable MIDI Clock, Tap Tempo
button6.poll();
//Save button tap as quarter
if(button6.pushed()) {
//Serial.println("6 pushed ");
timeTapAct=millis();
//start new if time elapsed > 1500 ms (means beat < 40 bpm)
if (timeTapAct-timeTapLast>1500){
//Serial.println("Time diff in ms: " + String(time3-time4)) ;
timeTapLast = timeTapAct;
}else{
timeClock = (timeTapAct-timeTapLast)/24;
//Serial.println("Set Time Clock in ms: " + String(timeClock)) ;
timeTapLast = timeTapAct;
//Reset counter
countClock=0;
}
}
//Swith Tap Tempo on/off
/* if(button6.longPress()) {
//Serial.println("6 longPress ");
clockOn=!clockOn;
}*/

//tempo (Timing Clock 24 times per quarter)for the duration of two quarters
timeAct=millis();
if ((timeAct - timeLast > timeClock)&& countClock<48){
//Serial.println("Send Time Clock in ms: " + String(timeClock)) ;
MIDI.sendRealTime(Clock); // Send Clock
++countClock;
timeLast = timeAct;
}

//if rythm was on it will be stopped after tempo setting. Start it again
if (countClock == 48 )
{
//MIDI.sendControlChange(control1,127,1); // Set Control
//delay(10);
MIDI.sendControlChange(control1,0,1); // Reset value to prepare for next set
delay(5);
++countClock;
}

//Send ControlChange 'Play/Rec'
button7.poll();
if(button7.pushed()) {
//Serial.println("7 pushed ");
MIDI.sendControlChange(control2,127,1); // Set Control
delay(10);
MIDI.sendControlChange(control2,0,1); // Reset value to prepare for next set
delay(5);
}

//Send ControlChange 'Stop'
button8.poll();
if(button8.pushed()) {
//Serial.println("8 pushed ");
MIDI.sendControlChange(control3,127,1); // Set Control
delay(10);
MIDI.sendControlChange(control3,0,1); // Reset value to prepare for next set
delay(5);
}

//Send ControlChange 'Undo/Redo'
button11.poll();
if(button11.pushed()) {
//Serial.println("11 pushed ");
MIDI.sendControlChange(control5,127,1); // Set Control
delay(10);
MIDI.sendControlChange(control5,0,1); // Reset value to prepare for next set
delay(5);
}

//Send ControlChange 'Clear'
button12.poll();
if(button12.pushed()) {
//Serial.println("12 pushed ");
MIDI.sendControlChange(control4,127,1); // Set Control
delay(10);
MIDI.sendControlChange(control4,0,1); // Reset value to prepare for next set
delay(5);
}

}